

Building the Mold
The custom molding process begins with design and construction of a precision-machined steel mold.
This mold, or tool, consists of two or more custom-tooled steel plates carefully registered to ensure consistent, close tolerances and appropriate surface finish.
After the rubber compound is placed or injected into the mold, the plates are exposed to heat and pressure to cure the part. The exact mix of time, temperature and pressure depends on the molding process and material.
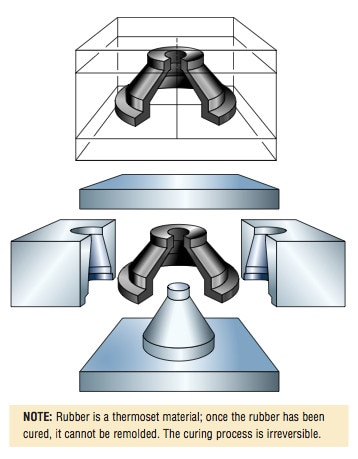
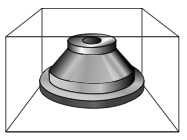
A molded rubber part, such as the simple rubber bushing shown, begins in the designer’s mind as a cavity in a solid steel block.
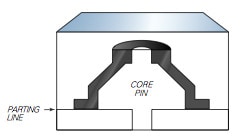
In order to get at the part, the block is “sliced” into plates. A tool steel pin, called a core pin, is inserted into one of the plates to form the interior dimensions of the part. The line on the surface of the part where the plates meet is the parting line. An excess amount of rubber is necessary in the cavity to ensure complete cavity fill and proper density. When pressure is applied, a small amount of this material is forced out of the cavity along the parting line to form a thin ridge of material known as flash. Removal of this flash from the part (de-flashing), is accomplished in a number of different ways, described here.
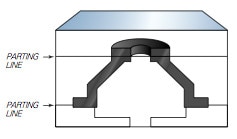
Sometimes the presence of a parting line is objectionable to the designer for functional or aesthetic reasons. This condition can be prevented by shifting the parting line from the top or bottom to the middle of the part.
A molded part may be too delicate, too small or too firm to be removed by hand from the cavity of a two-plate mold. Depending on the viscosity of the raw rubber, air may be trapped under the material, resulting in air pockets or weak sections in the finished part.
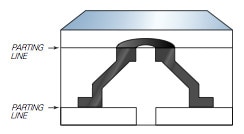
A common solution to both of these problems is a three-plate mold, as shown. When the molding process is complete, the plates are separated and the part is pushed out by hand or blown out with air.